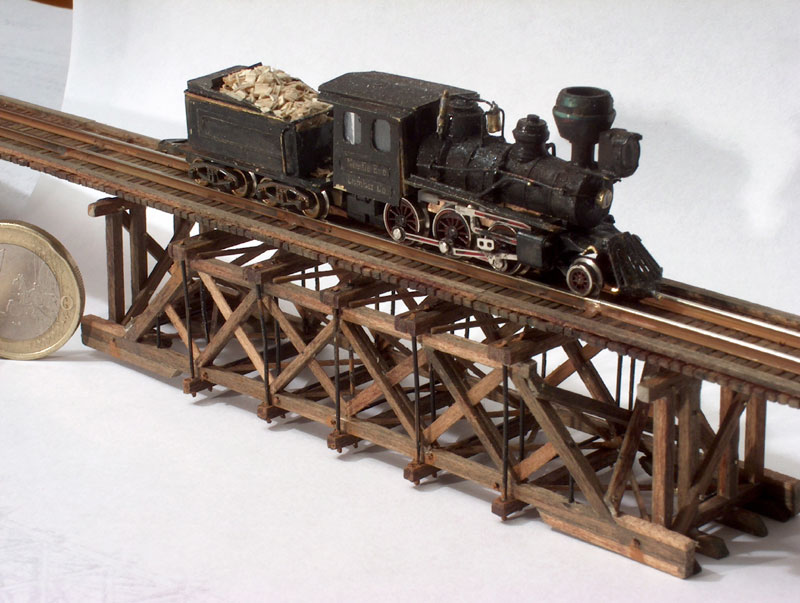
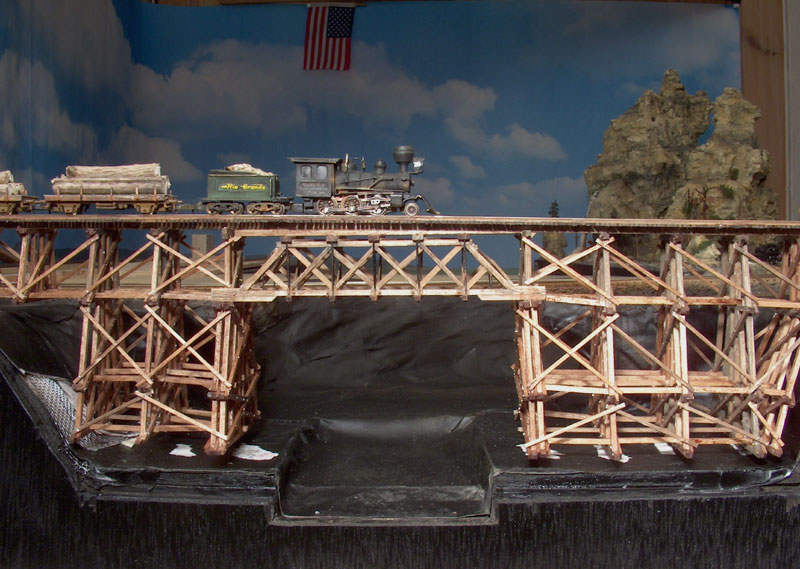
18.01.2005 "Needle Eye" Wooden-Trestle-Bridge-2005
I needed to rebuild some off my track layout on my Z-modules to accommodate some longer and heavier train setups. In this reconfiguration I saw that I could build a fairly large Wooden Trestle Bridge on my side track. So here is the story off the building off this Trestle.
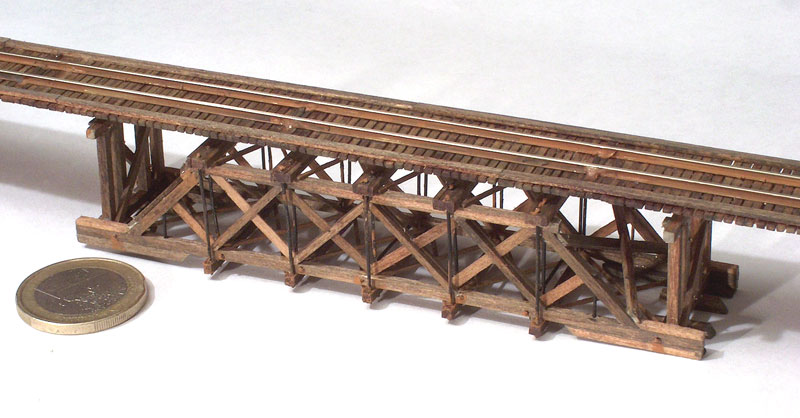
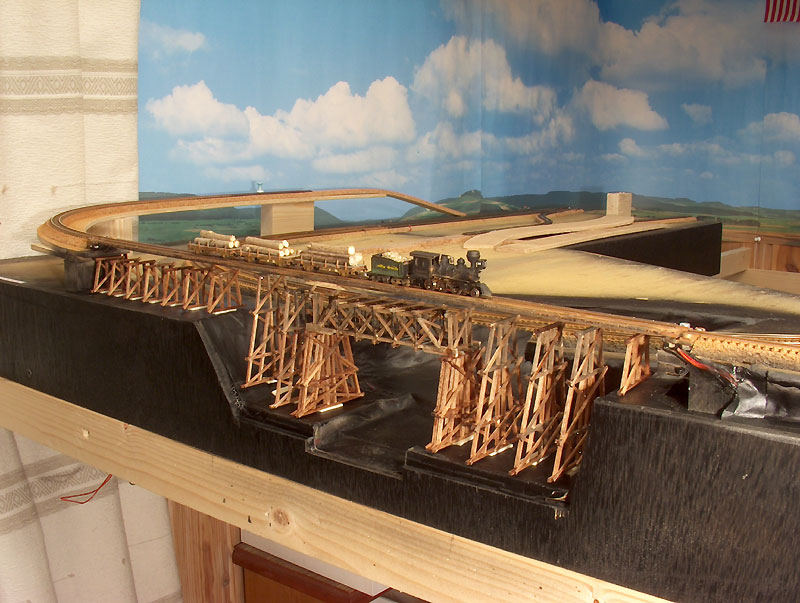
The total length of the bridge is about 500mm(19,7in) and the max. height is about 90mm(3.5in). The height of the deck bridge in the middle is only about 23mm.(0.9in)
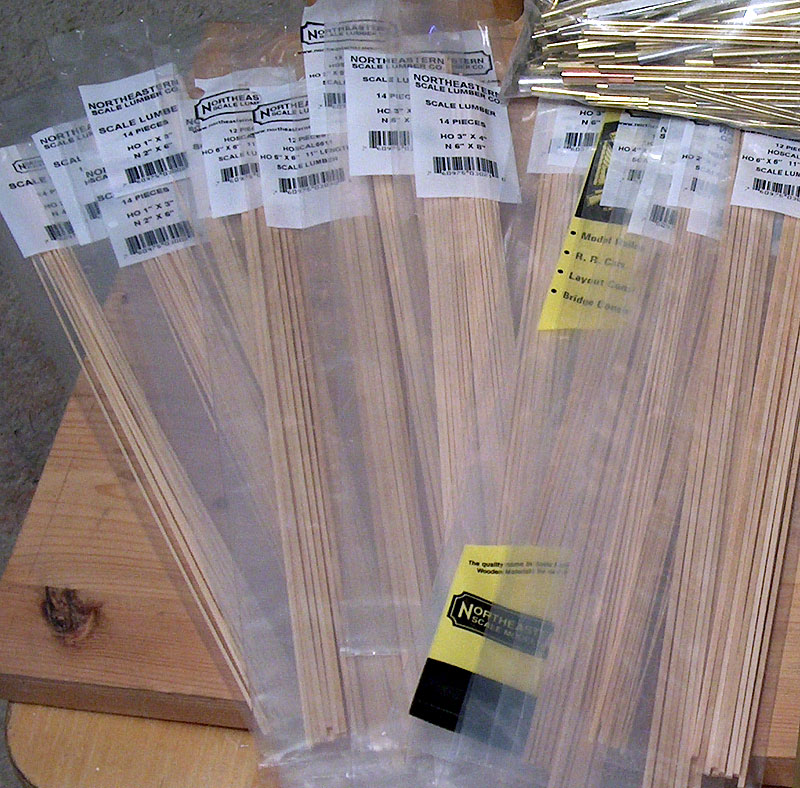 |
 I like
to work with real wood sins this give a real natural look and wooden
grain. I used a variety off Northeastern Wood products that I first I like
to work with real wood sins this give a real natural look and wooden
grain. I used a variety off Northeastern Wood products that I first
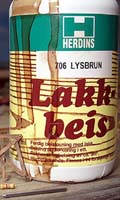
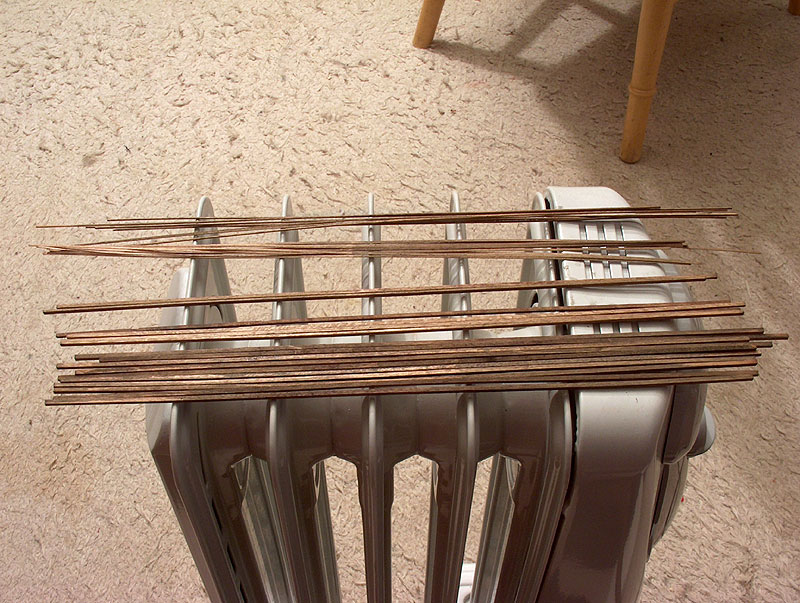 died
with Light Brown "Beis" (Paint). died
with Light Brown "Beis" (Paint). |
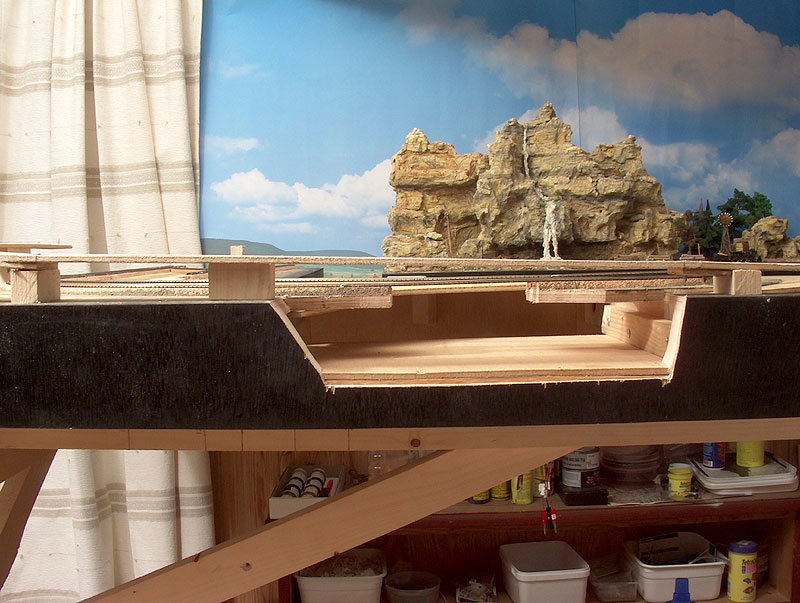 |
 Here I
have cut down the sidings of the module to ad more hight to the trestle. Here I
have cut down the sidings of the module to ad more hight to the trestle. |
 |
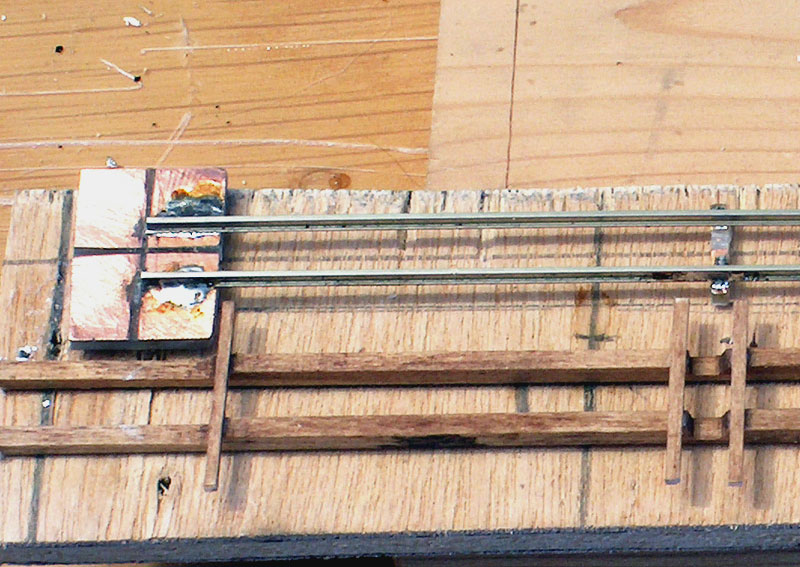
I cut up peaces off electronic print card
for homemaking. This I filed down the middle off the copper to insulate
them so I could use it as Track ties.
|
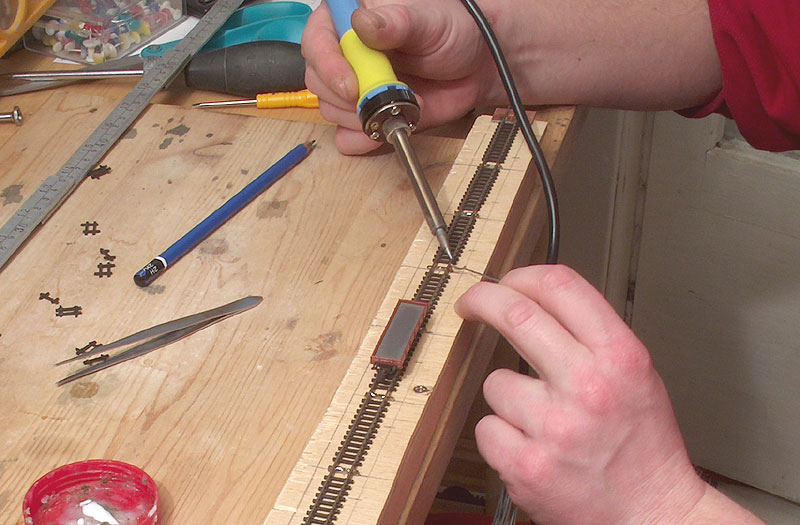 |
Then I cut out some of the ties on a Peco
flexi track section and soldered the “new” ties in place before taking
all the original ties away.
|
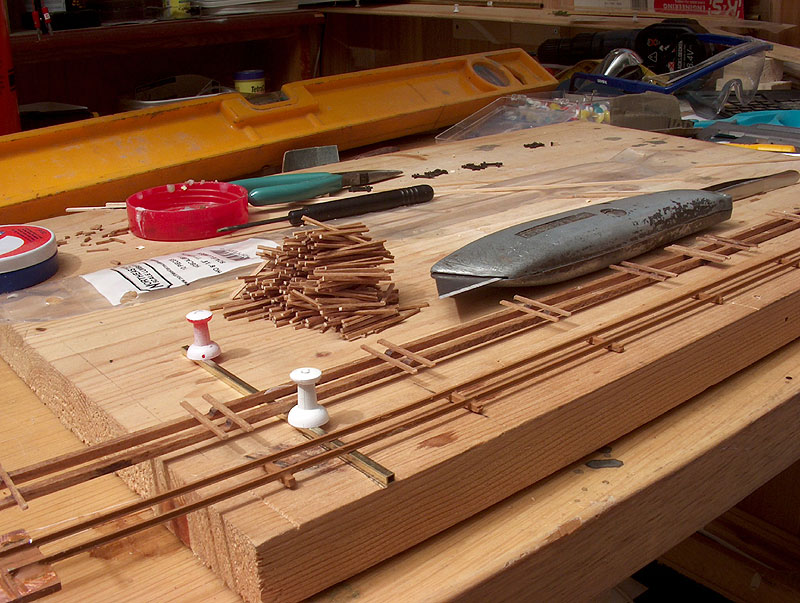 |
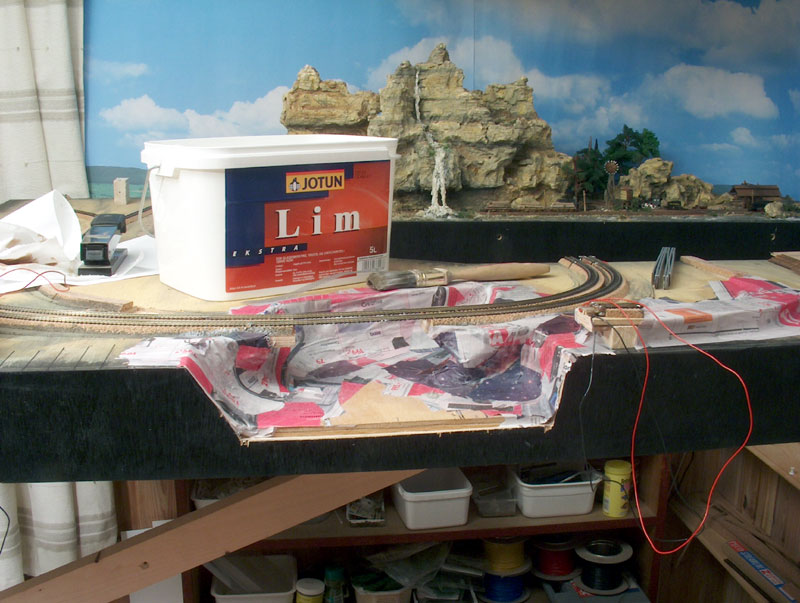
I cut up a lot off new wooden ties and
glued them on to a new base for the bridge deck. The total length off the bridge is about 50cm.
|
 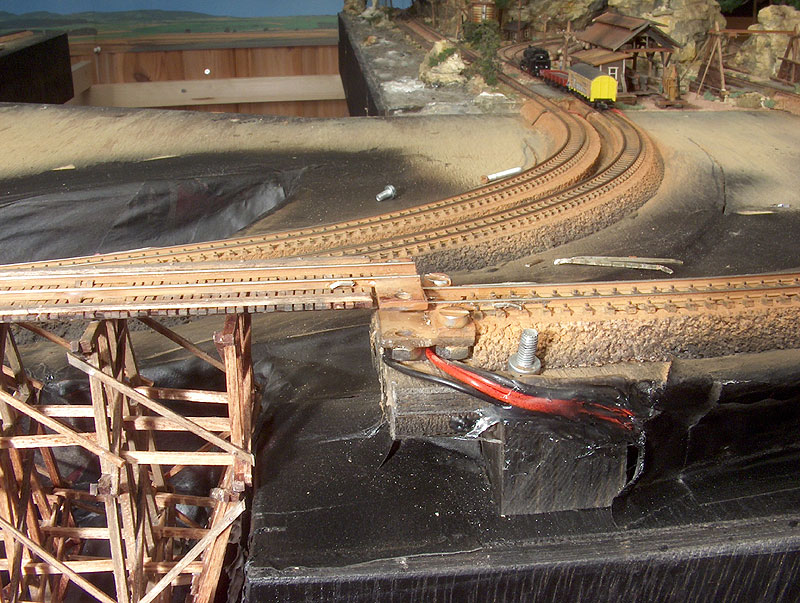 |
Here you can se the end connection off the bride to the rest off the layout. I’m making it so that I can later take it off and do future repairs and the bridge, and It makes it easier to build the rest off the landscape around the bridge. |
 |
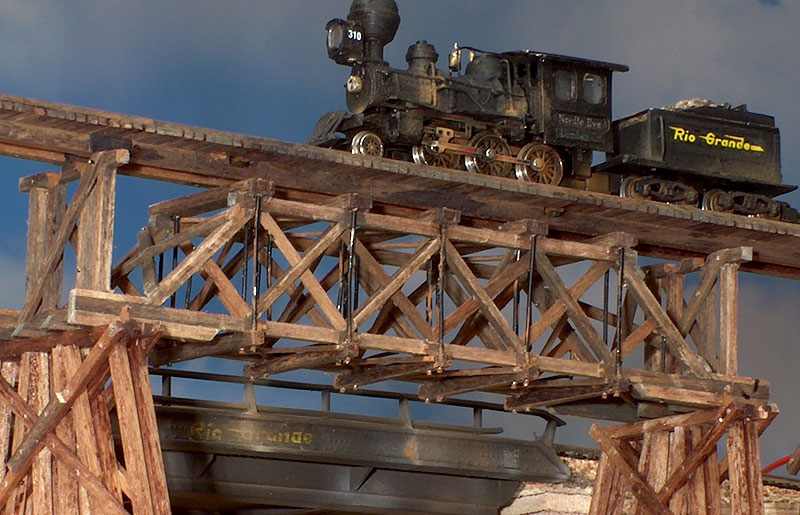
 This is
the beginning of building the deck bridge that is going over the “Needle
Eye” river. This is
the beginning of building the deck bridge that is going over the “Needle
Eye” river.
|
|
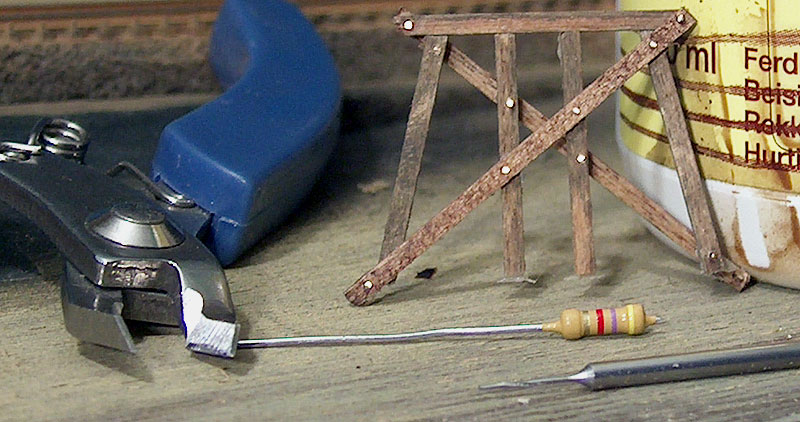
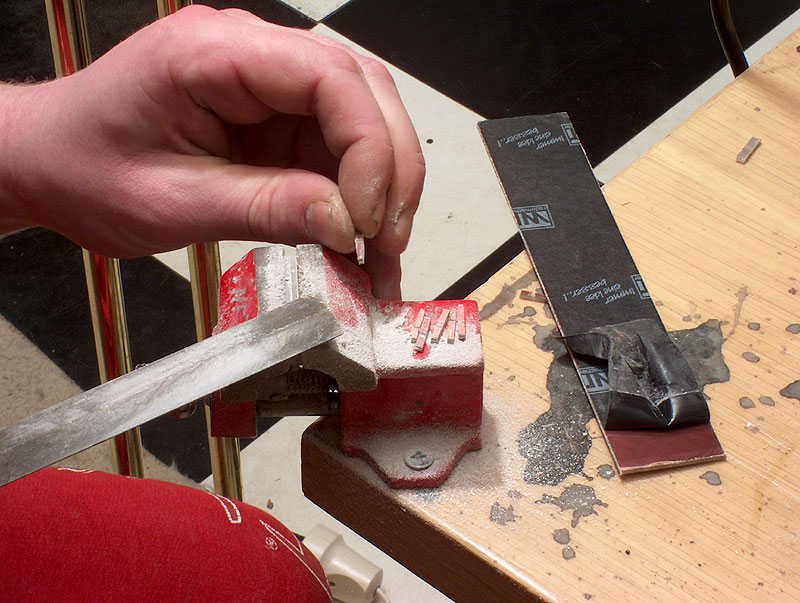
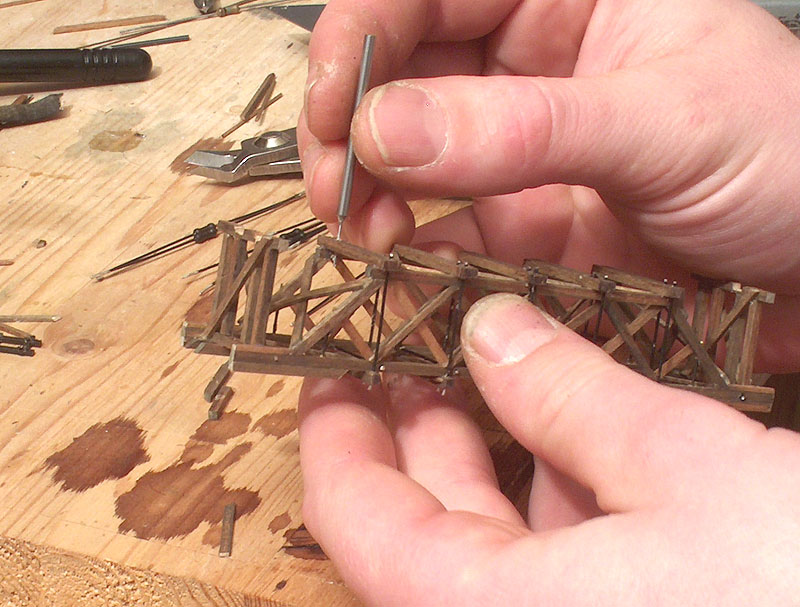
I used a small drill tap to make holes for all the “nails” that I was gone apply to the bridge. This turned out to be quit a time consuming job, it was a lot off ties connections to make. Must have been at least a 1000 of them. But I think that the end results will be good with a lot off details. For “nails” a used the wire from some resistors that I filed down after cutting them off. |
 |
For the “tension” rods I also used the wire
from some resistors
|
   |
 |
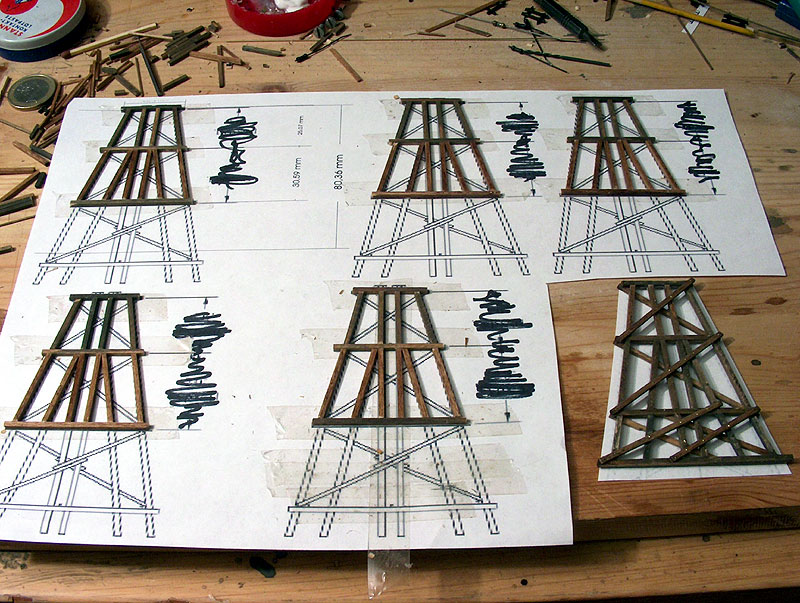 |
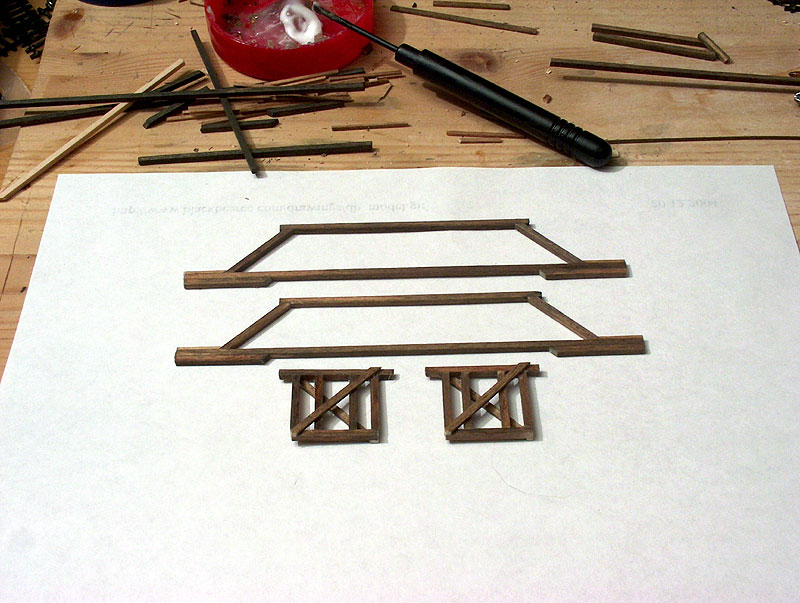
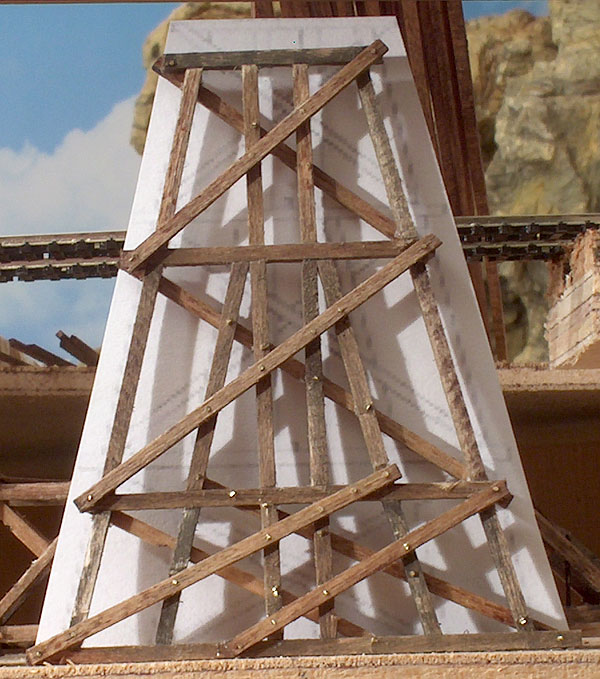
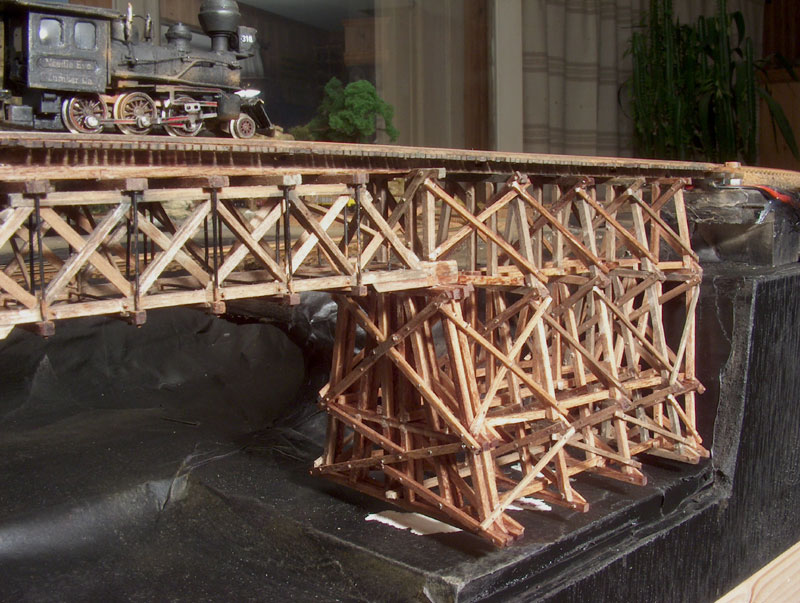
For the trusses I made a “jig” in Corel
Draw and printed it out on paper. Used double sided tape to hold the timber in place while working. The trestles are made the “correct” way that it would be built in real life. (I think?) The trestles are built in a typical “Rio Grande Southern Style” With some small customizations by me. |
 |
|
 |
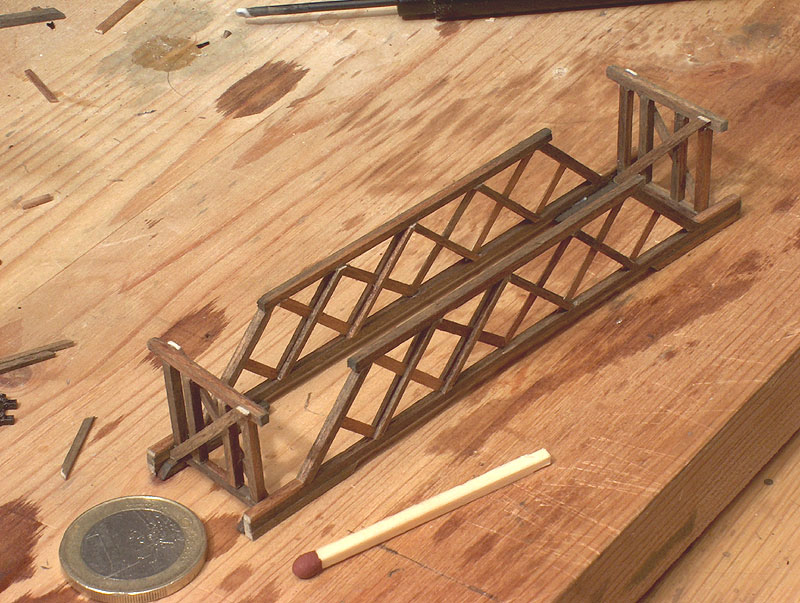
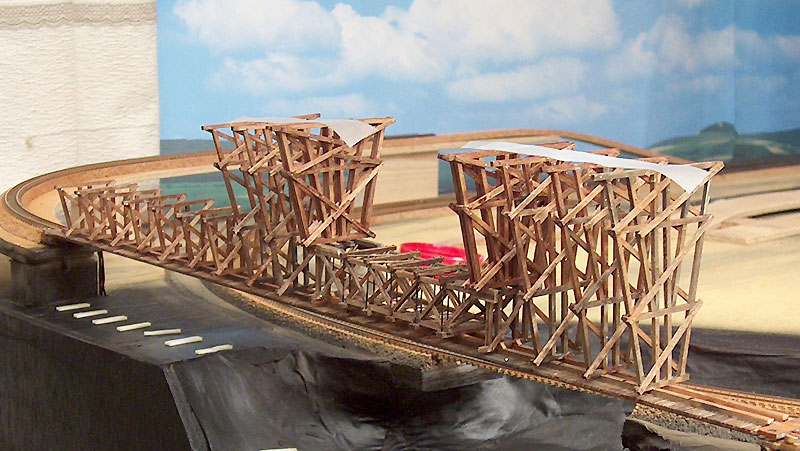
This is the first test installation to se
where the trusses could be placed before gluing the on to the bridge
deck.
|
 |
|
 |
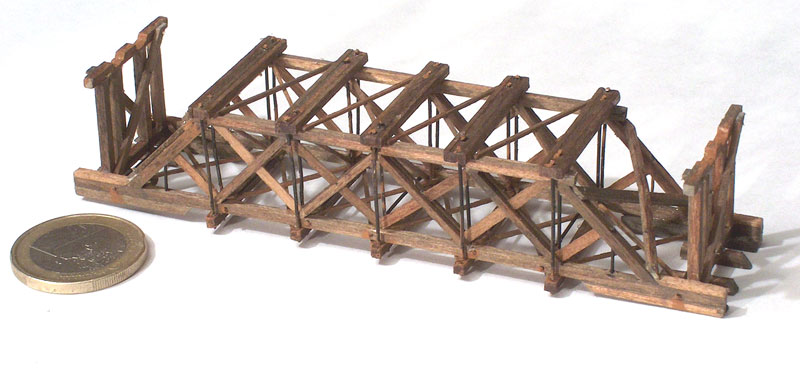
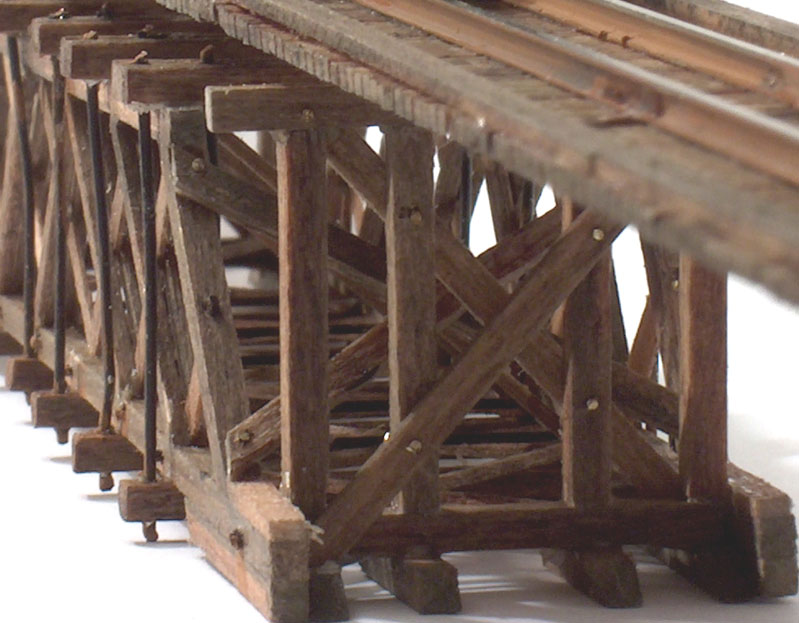
After the trusses had dried I added the
brazes and stiffener to between the them and the bridge is ending its
construction completion. Now I have to detail it and whether it some
more before it final completion. I also have to make the foundations for the trusses before I continue with the rest of the riverbed and so on. |
 |
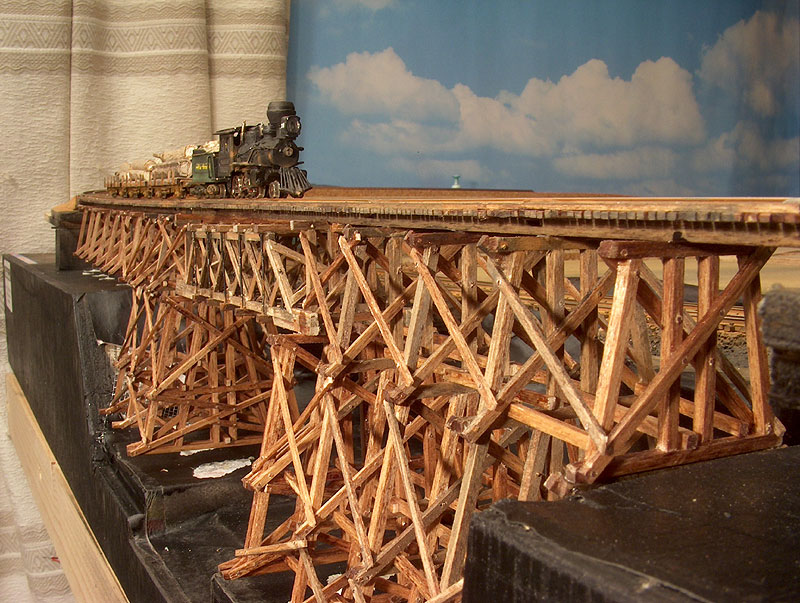
As you can se here I had to cut out some
more of the sidings to so that I can ad some depth the the riverbed
under the deck bridge. I learn as go along with the building off all my
layouts.
|
 |
|
 |
|